Creating an AWS Simple Queue Service (SQS) queue is a straightforward process that can be accomplished using the AWS Management Console or AWS Command Line Interface (CLI). Here’s a step-by-step guide for creating an AWS SQS queue through the AWS Management Console:
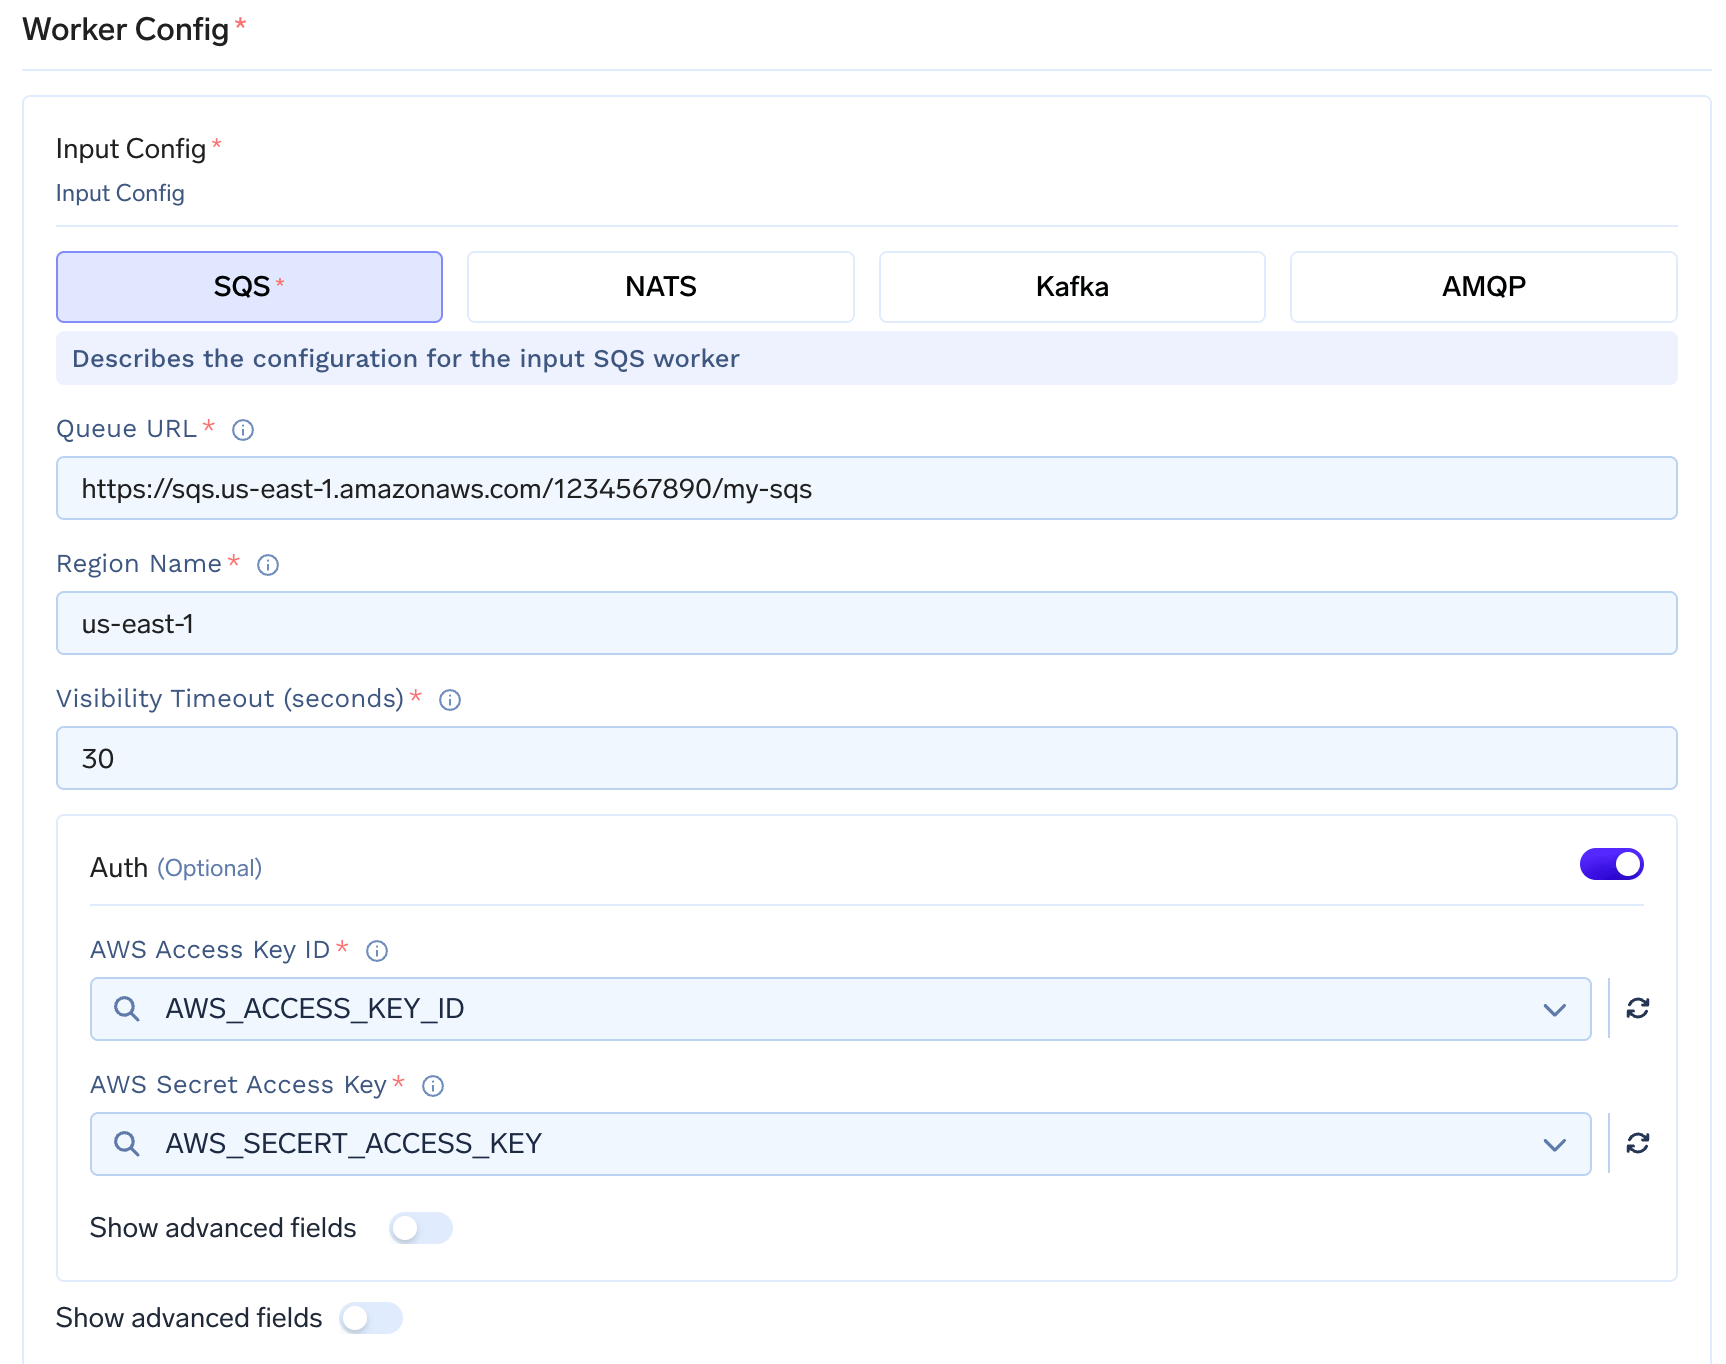
Note:The visibility timeout has a significant impact on the behavior of asynchronous services.It determines how long a message remains hidden from consumers after it’s fetched from the queue, playing a vital role in preventing multiple consumers from processing the same message concurrently.For example, if your worker process typically takes around 5 seconds to complete a task, it’s advisable to set the Visibility Timeout to at least twice that duration, which in this case would be 10 seconds.If the Visibility Timeout is set too low, there’s a risk of multiple consumers attempting to process the same message simultaneously, potentially leading to conflicts and errors in your system. It’s essential to strike the right balance to ensure efficient and orderly message processing.
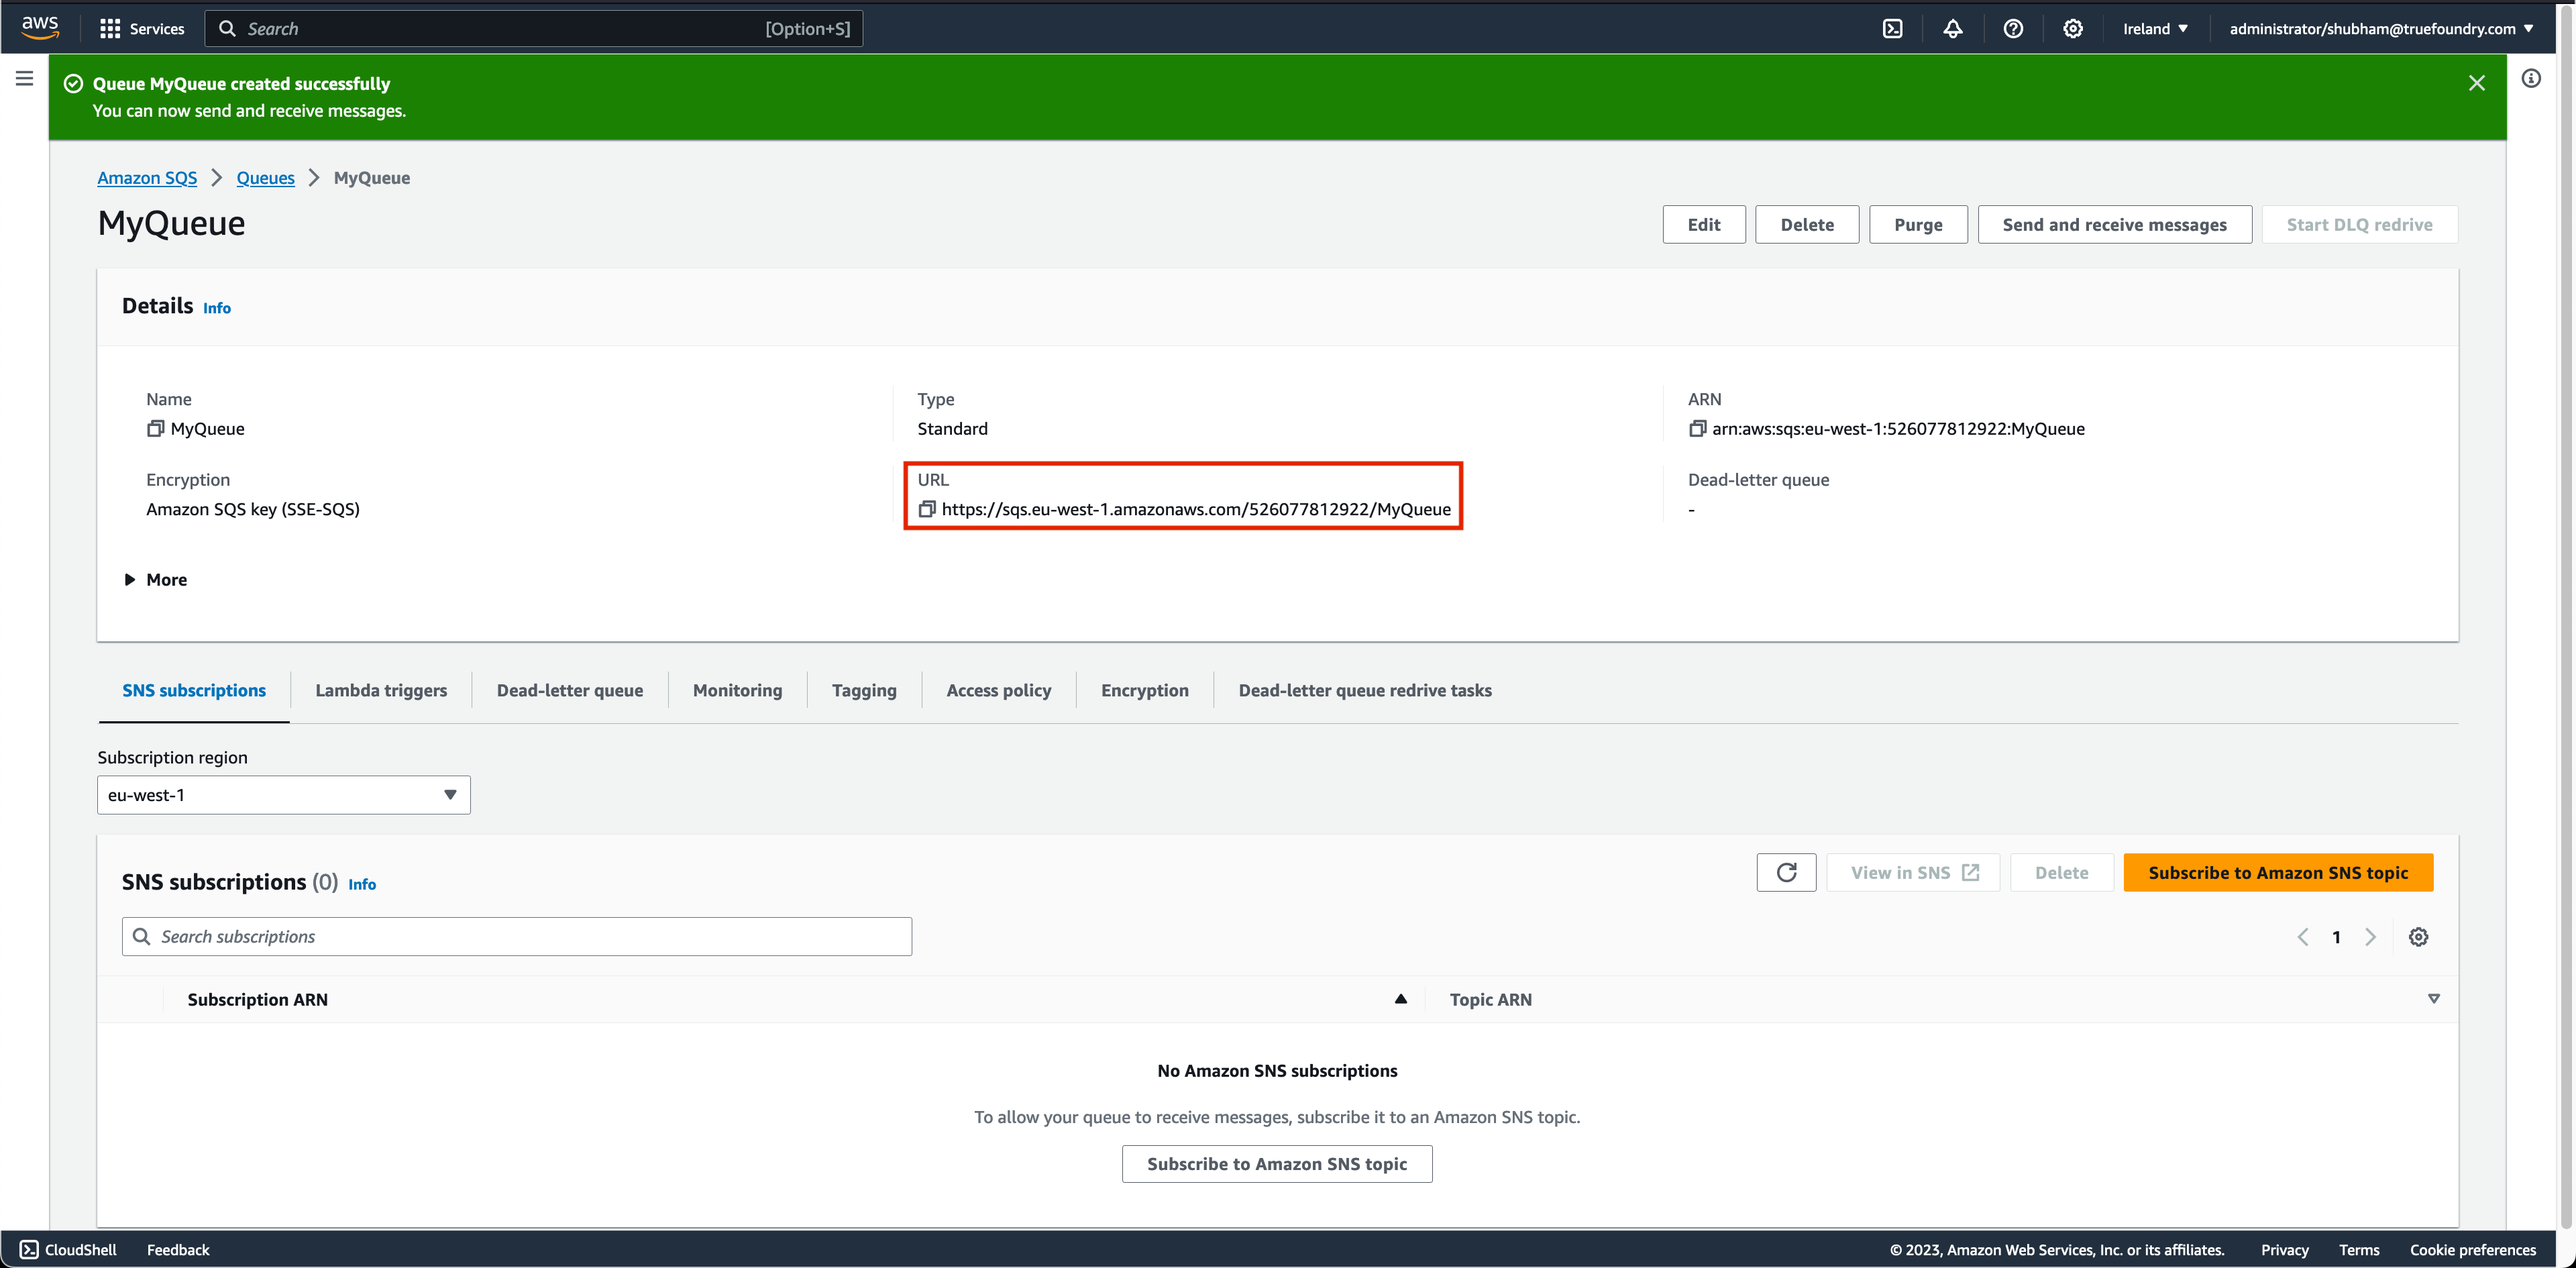
Once you click on Create queue, you’ll receive a confirmation message indicating the successful creation of the queue.
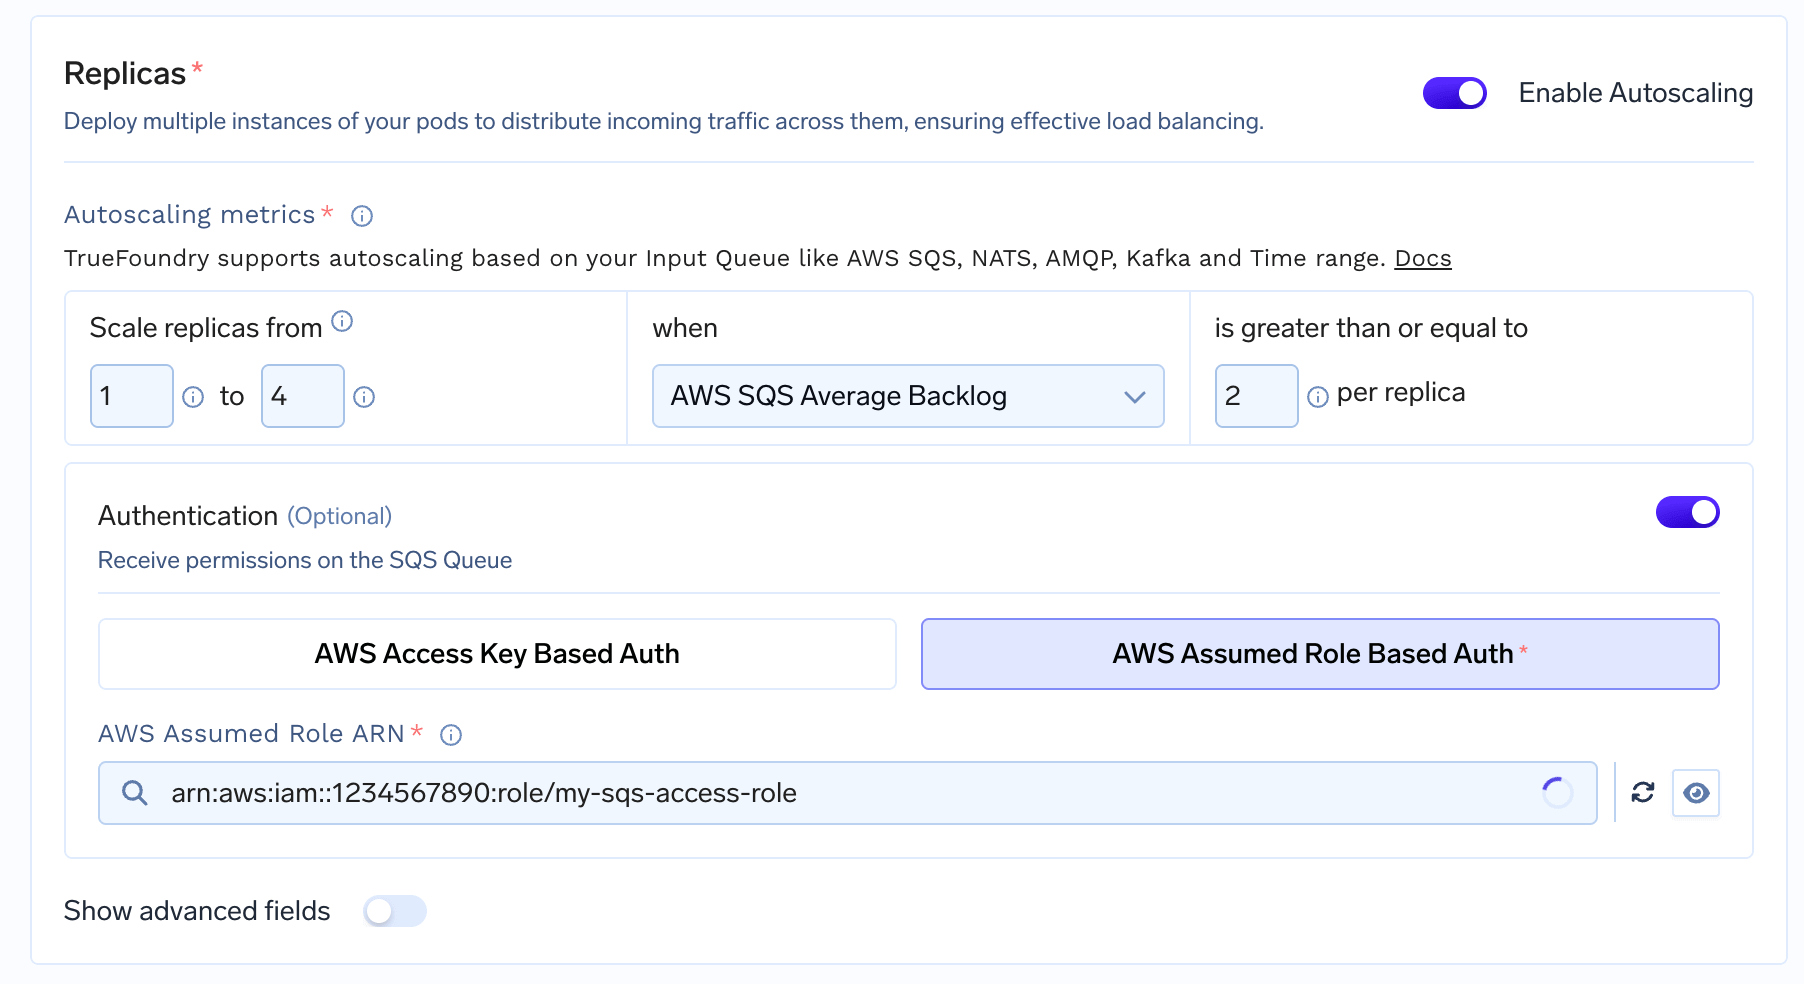
AWS SQS Average Backlog is defined as the AWS SQS pending queue length averaged over all replicas that the autoscale is designed to maintain.The pending queue length refers to the number of messages that are currently in the queue but have not yet been processed. These are messages waiting to be consumed and processed by the relevant workers or services.The average backlog is the average or mean value of the pending queue length across multiple replicas. In a distributed and auto-scaling system, there can be multiple instances or replicas of your service, each with its queue. The average backlog provides a way to measure the workload across all replicas.This Average Backlog is a valuable metric for determining how to scale your application efficiently.
Note:This metric is only available in case you are using AWS SQS for your input queue OR authentication is configured under autoscaling.
You can configure AWS IAM User with permissions to read and write to SQS Queue and generate Access key pair. You can configure AWS Access Key ID and AWS Access Secret Key in input config of SQS.
{ "Version": "2012-10-17", "Statement": [ { "Sid": "", "Effect": "Allow", "Principal": { "AWS": "arn:aws:iam::1234567890:role/keda-operator-platform-role" # IAM Role ARN attached to keda operator pod. }, "Action": "sts:AssumeRole" }, { "Effect": "Allow", "Principal": { "Federated": "arn:aws:iam::1234567890:oidc-provider/oidc.eks.us-east-1.amazonaws.com/id/ABCDEFG1234567890ABCDEFG" # AWS OIDC ARN for EKS }, "Action": "sts:AssumeRoleWithWebIdentity", "Condition": { "StringEquals": { "oidc.eks.us-east-1.amazonaws.com/id/ABCDEFG1234567890ABCDEFG:aud": "sts.amazonaws.com", # AWS OIDC Claim "oidc.eks.us-east-1.amazonaws.com/id/ABCDEFG1234567890ABCDEFG:sub": "system:serviceaccount:my-workspace:my-async-service" # AWS OIDC claim, Namespace and serviceaccount for async service } } } ]}
Add the Role ARN for the above created role as IRSA annotations in serviceaccount used in your async service application. Also, when enabling autoscaling, add the Role ARN in authentication.
Please ensure platform IAM role is attached to Keda operator pods to be able to pull metrics when autoscaling is enabled.
Configuration for IAM Role to be attached to Keda operator
Queue lag threshold: This is the maximum number of messages each replica should handle. If there are more messages than the threshold, the auto-scaler adds replicas to share the workload.