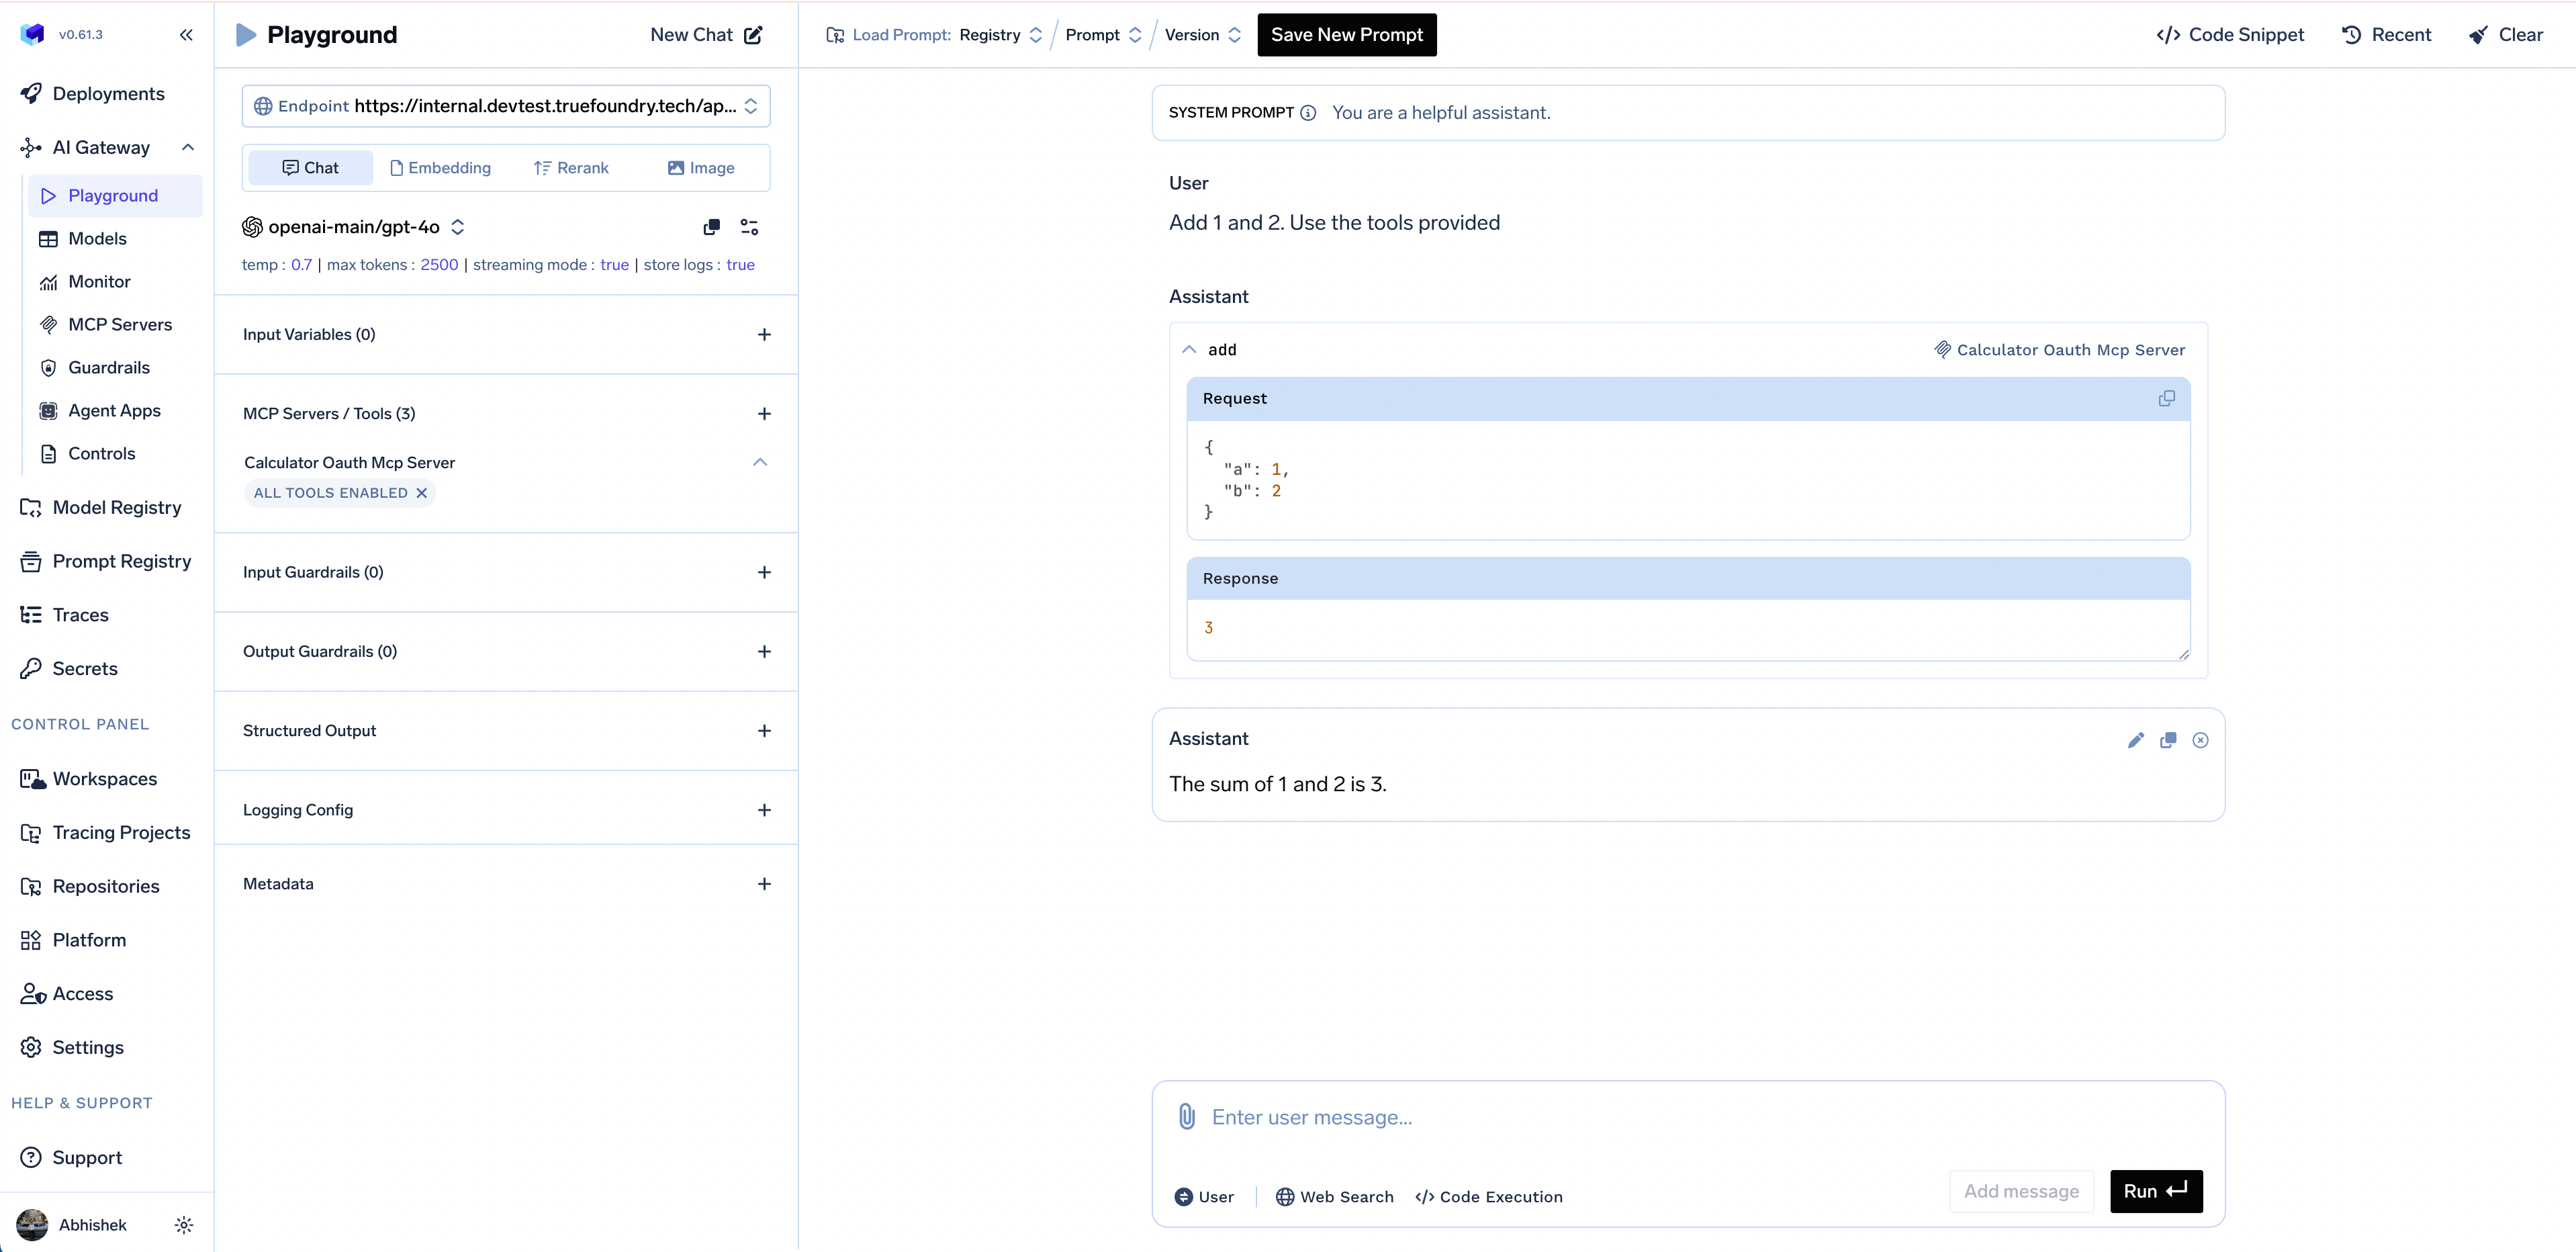
- User Authentication: Authenticate specific users through the AI Gateway using the Authorization Code flow with refresh tokens
- Machine-to-Machine Authentication: Enable programmatic access without user interaction using the Client Credentials grant flow
The entire code for the steps described below can be found in this Github link: https://github.com/truefoundry/getting-started-examples/tree/main/calculator-oauth-mcp-server
Guide to creating the MCP server and adding Oauth
1
Write a basic MCP Server and test it locally
Let’s start by writing a basic MCP server that provides a Run the server locally:Your MCP server will be available at This MCP server is running without any authentication. Enable OAuth next by registering the server in Okta, then adding JWT verification to the code.
get_me tool.server.py
http://localhost:8000/mcp. Test the server using this Python script:test.py
2
Register the MCP server in Okta
Create an authorization server, OAuth app, access policy, and scopes in Okta. Follow Okta app setup and collect:
- OAUTH_ISSUER and OAUTH_JWKS_URI (from the authorization server)
- OAUTH_AUDIENCE
- CLIENT_ID and CLIENT_SECRET (for TrueFoundry; the MCP server itself only needs issuer, JWKS, and audience to verify tokens)
3
Modify MCP server code to add Oauth Token verification
Create a .env file to add the environment variables and modify the server.py file to add the JWT verification.
4
Get the token and call the MCP server in test.py (Machine-to-Machine authentication)
In Step 1, we had a script to test the MCP server locally. After adding the Oauth token verification to the MCP server in the previous step, we need to modify the script to get the token and then call the MCP server. If you call the MCP server without a token, it will return a 401 Unauthorized error.The test.py script above contains the code to get the Okta token and then call the MCP server.This is exactly how you will be doing Machine-to-Machine authentication to the MCP server. Code snippets to get the token in different ways are outlined below:Response:
test.py
The
OAUTH_WELL_KNOWN_URL enables the MCP server to expose the /.well-known/oauth-authorization-server endpoint, which allows the AI Gateway to auto-discover OAuth configuration details. This endpoint redirects to your Okta authorization server’s well-known endpoint.- Using cURL
- Using Python
- Using Python with requests-oauthlib
When using a custom authorization server, you can use custom scopes defined in your authorization server. Make sure to include the
audience parameter matching the audience configured in your authorization server.5
Host the MCP server and get the endpoint URL
Now that we have tested the MCP server locally, we will add it to the AI Gateway to enable user authentication and allow the MCP server to be accessed via the AI Gateway.
To add the MCP server to the AI Gateway, we need to get the endpoint URL of the MCP server. Hence, we need to host the MCP server on a public URL.Remember to add the environment variables for the MCP server:After deployment, you will have the endpoint URL of the MCP server. Let’s consider it
The MCP server only needs these environment variables to validate OAuth tokens. It doesn’t need the Client ID or Client Secret since it’s only validating tokens, not generating them.
https://calculator-oauth-mcp-server.example.com for the rest of the steps.
After deploying, check once using the test.py script above by changing the MCP server URL to the deployed URL. You should be able to fetch the tools from the MCP server.6
Add the MCP server to the TrueFoundry AI Gateway
You will need to have a MCP server group to be able to add the MCP server to the TrueFoundry AI Gateway. Please refer to the Getting Started guide to create a MCP server group.
- In your MCP Server Group, click Add MCP Server
- Select Remote MCP
-
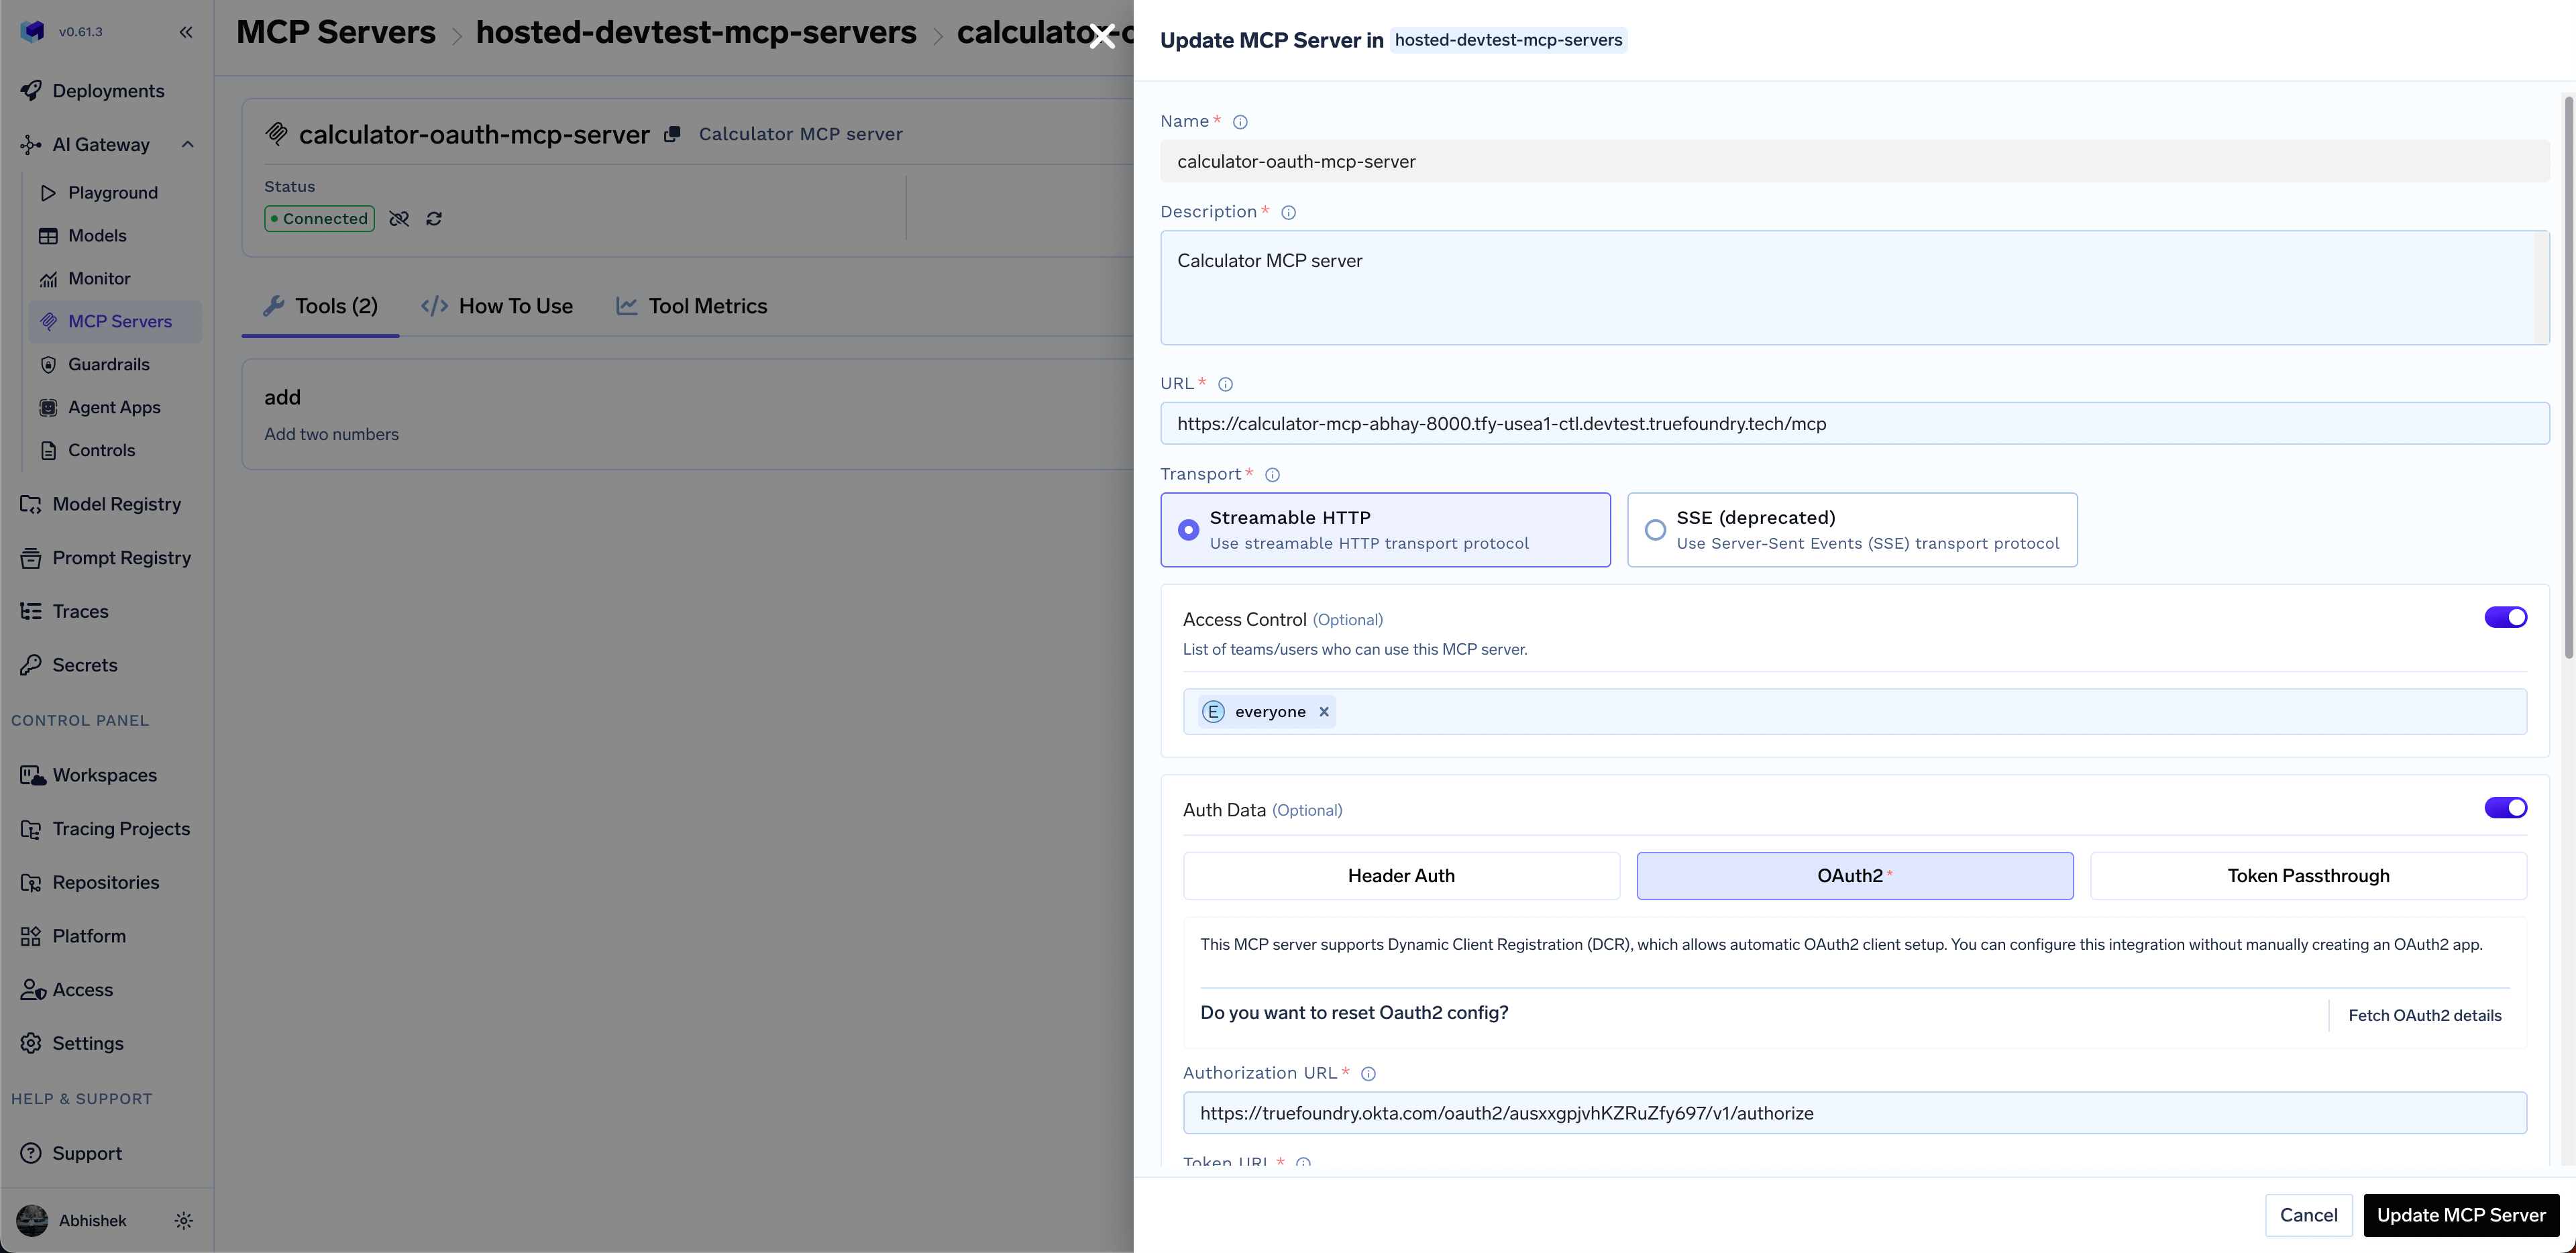
Configure the server:
- Name:
oauth-mcp-server - Description: OAuth-authenticated MCP server with Okta
- URL: Your deployed service endpoint (e.g.,
https://calculator-oauth-mcp-server.example.com/mcp). - Transport:
streamable-http - Authentication Type: Select OAuth2
- Name:
-
In the OAuth2 configuration section, provide the Okta credentials:
- OAuth2 Client ID: Your Okta application client ID
- OAuth2 Client Secret: Your Okta application client secret
The AI Gateway will automatically discover the OAuth2 Authorization URL, Token URL, and other configuration details from your MCP server’s
/.well-known/oauth-authorization-server endpoint once you provide the MCP server URL.You can optionally configure:- OAuth2 Scopes: The scopes are prefilled, but you can change them if needed to use your custom scopes.
- Include
offline_accessin the scopes to enable refresh tokens. This allows the AI Gateway to automatically refresh expired access tokens without requiring users to re-authenticate. - You can store the client id and secrets in truefoundry secrets and reference them by FQN in the configuration.
- Set access control: Select teams or users who should have access to this MCP server.
Managers of the MCP Server Group automatically have access to all servers in the group.
- Click Save to add the MCP server
- The server will appear in your MCP Server Group
- Users can now connect and use the server through the AI Gateway
7
Test the MCP server in the Playground
- Navigate to the Playground in the AI Gateway.
- Click Add Tool/MCP Servers
- Find your
calculator-oauth-mcp-serverin the list - Click Connect Now to initiate OAuth authorization
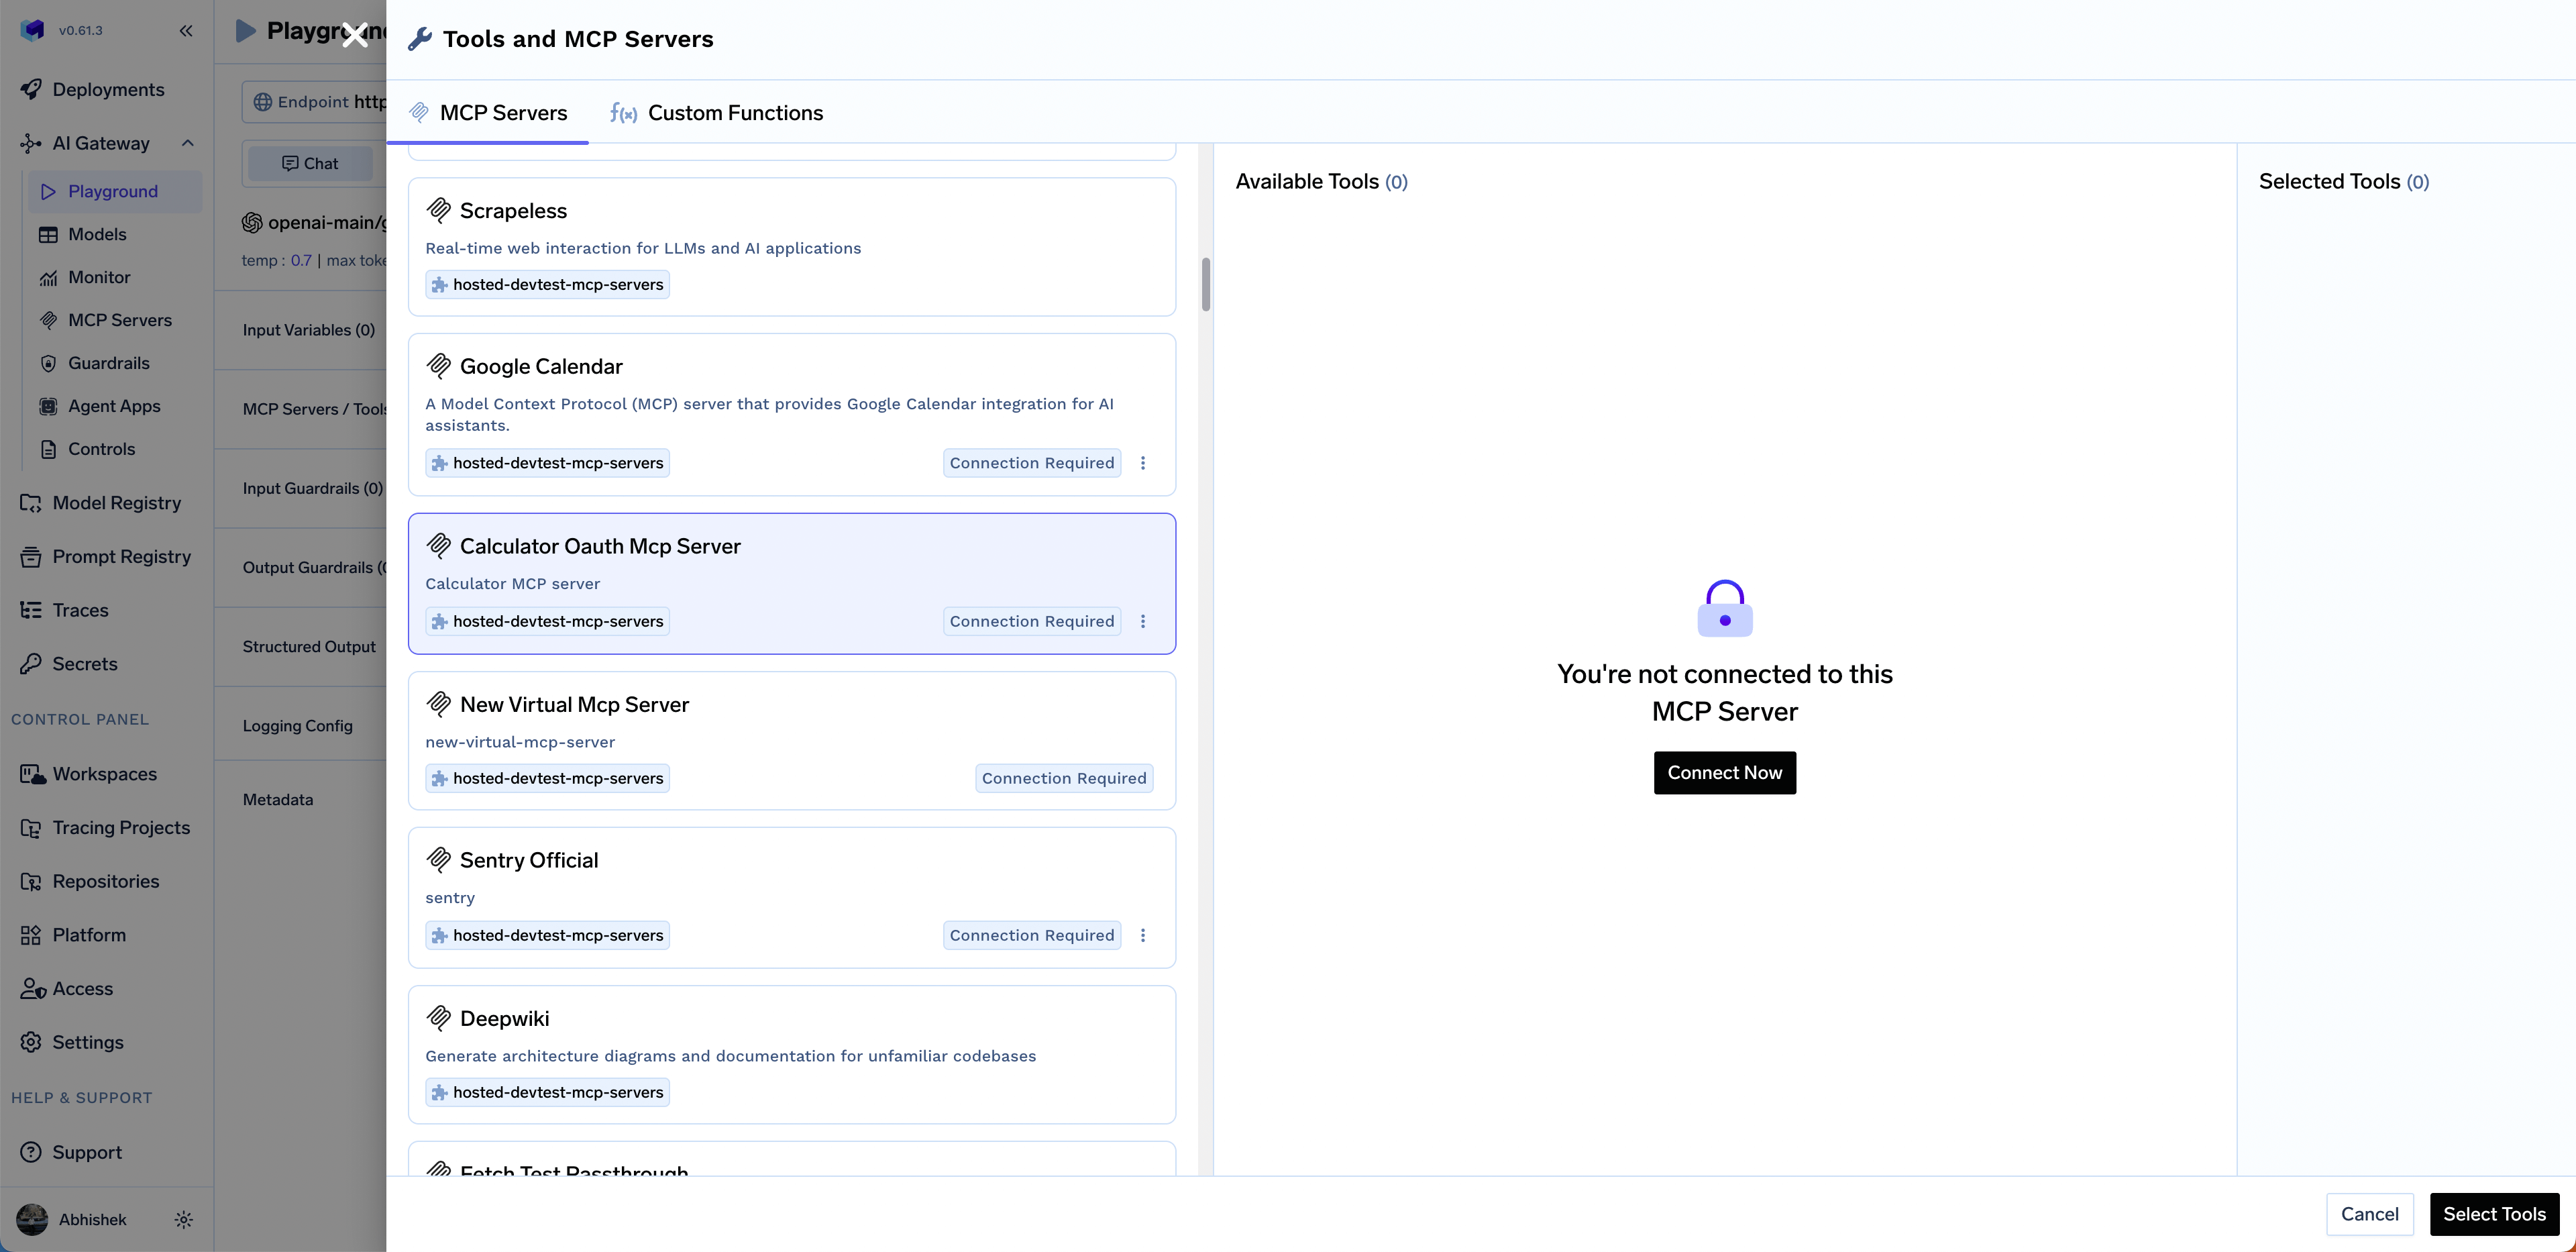
- You’ll be redirected to Okta to authorize access
- Click Allow to grant access
- You’ll be redirected back to the AI Gateway
- The AI Gateway will store your OAuth tokens securely and refresh them automatically when they expire
- You’ll see the
addandsubtracttools from your MCP server - Select the tools and click Done
- Try sending a prompt like
Add 1 and 2. Use the tools provided - The tool will return the result from your MCP server